> ## Documentation Index
> Fetch the complete documentation index at: https://developers.deepl.com/llms.txt
> Use this file to discover all available pages before exploring further.
# Managing API Keys in the Account UI
> Create, rename, deactivate, and set usage limits and permissions on DeepL API keys in the account UI.
Manage your API keys in the ["API Keys & Limits" tab](https://www.deepl.com/your-account/keys) when signed into your DeepL API account. A single subscription can have multiple simultaneously active keys: up to 25 on Pro API plans and up to 2 on Free API plans.
To create, deactivate, and limit developer keys programmatically instead, use the [Admin API](/docs/admin/overview#the-admin-api).
 ## Create a key
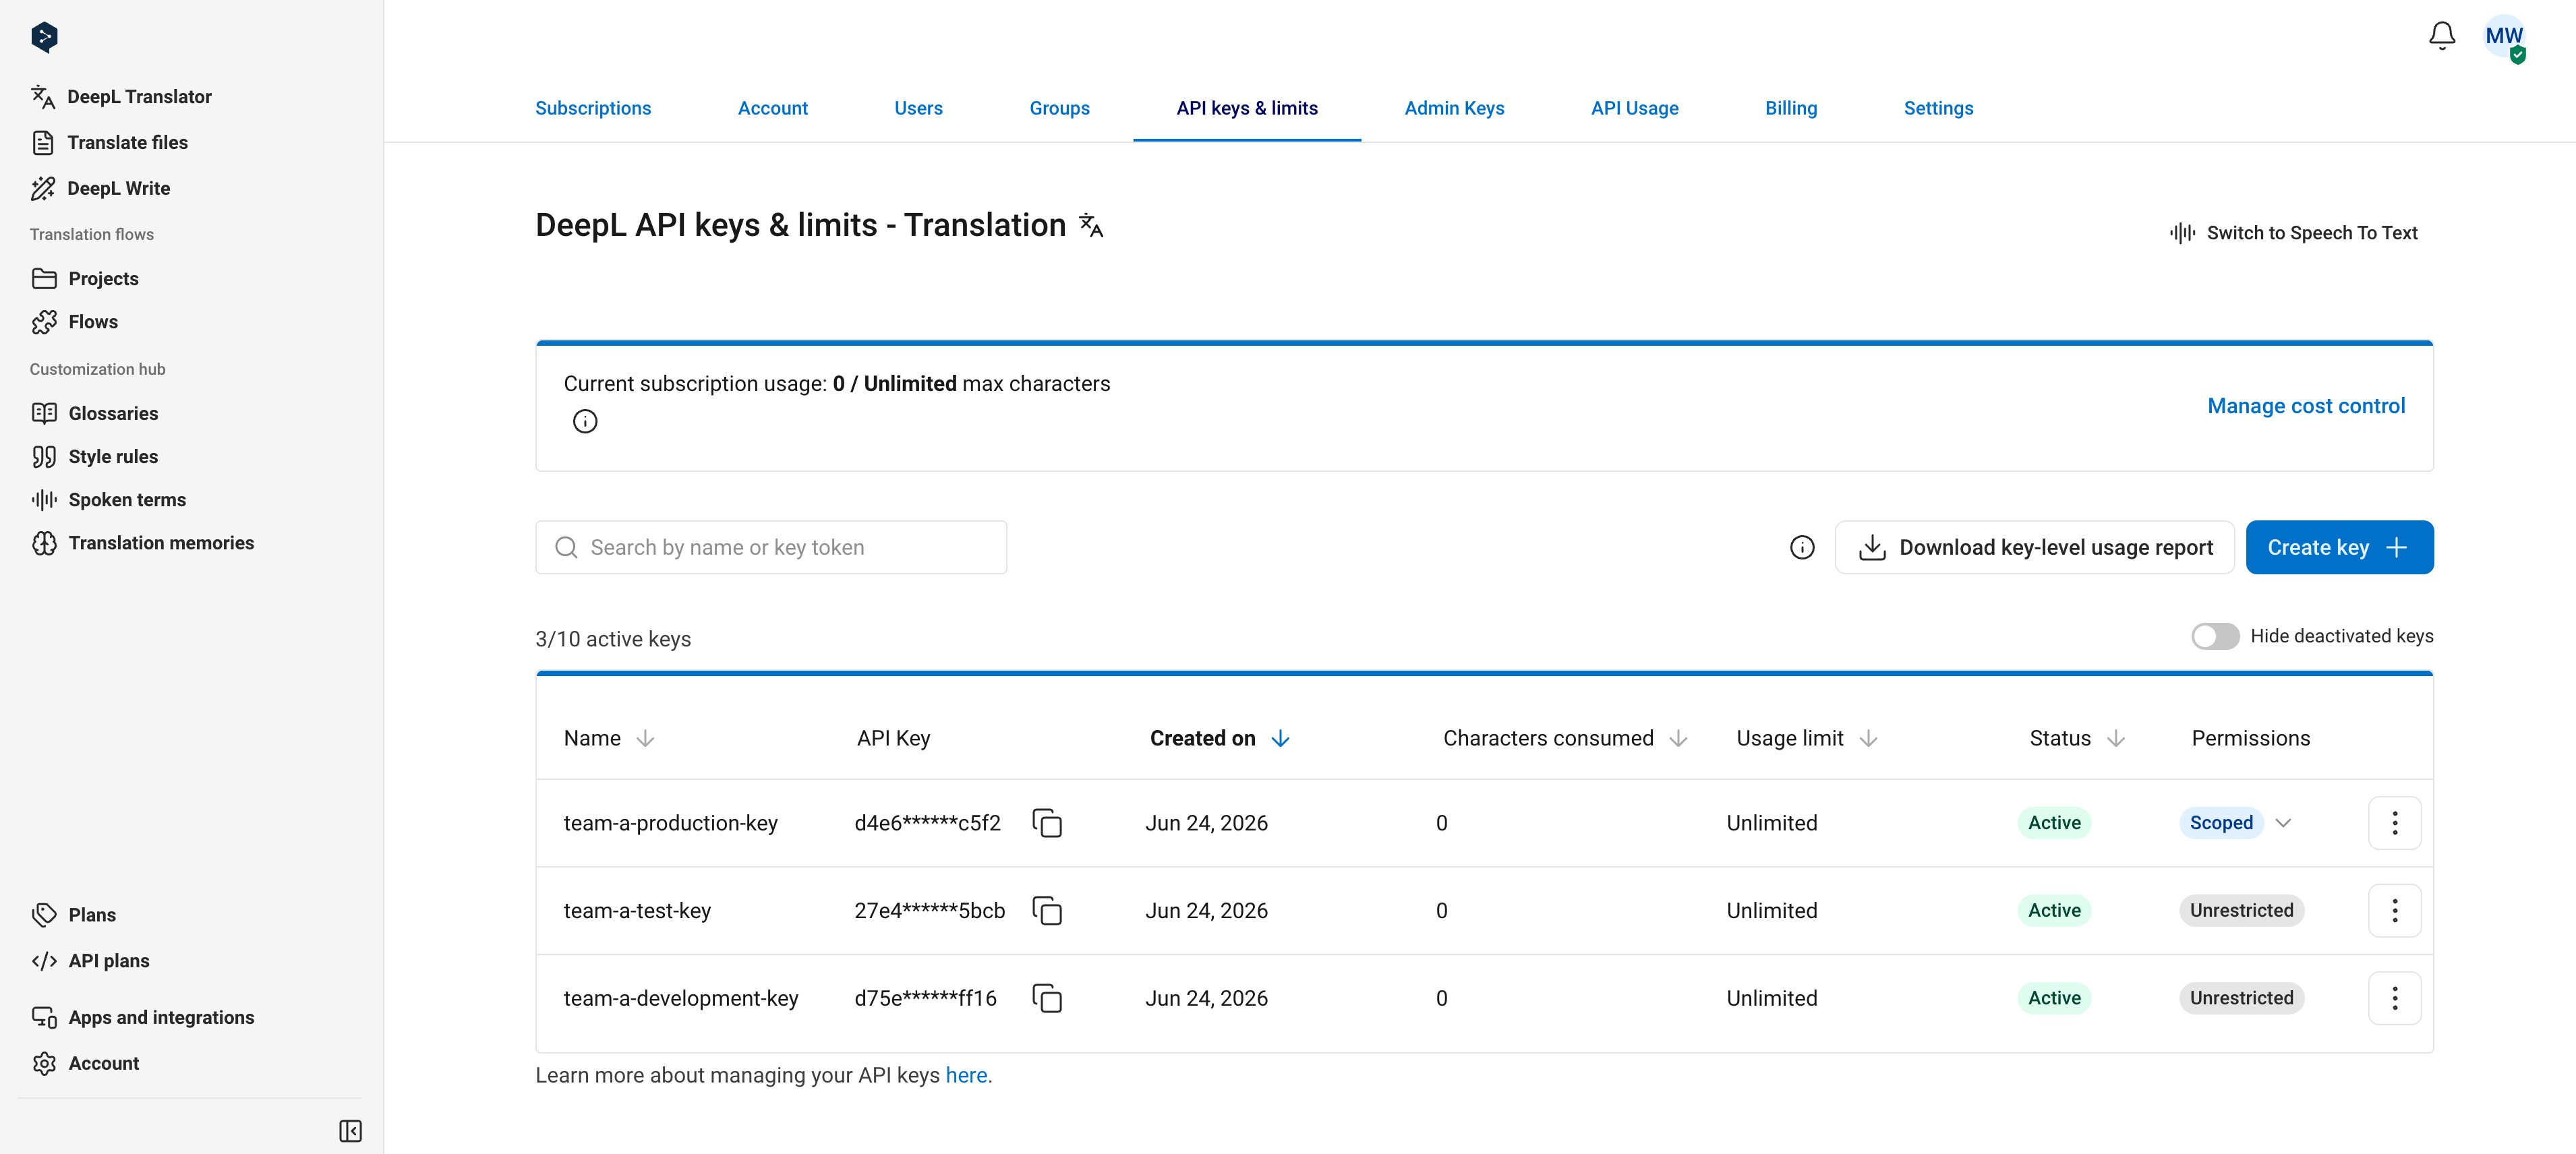
Click "Create key". You can optionally name the key during creation; if you don't, it's named "DeepL API Key" automatically. Naming keys lets you find them later using the search bar on the "API keys" tab.
## Create a key
Click "Create key". You can optionally name the key during creation; if you don't, it's named "DeepL API Key" automatically. Naming keys lets you find them later using the search bar on the "API keys" tab.
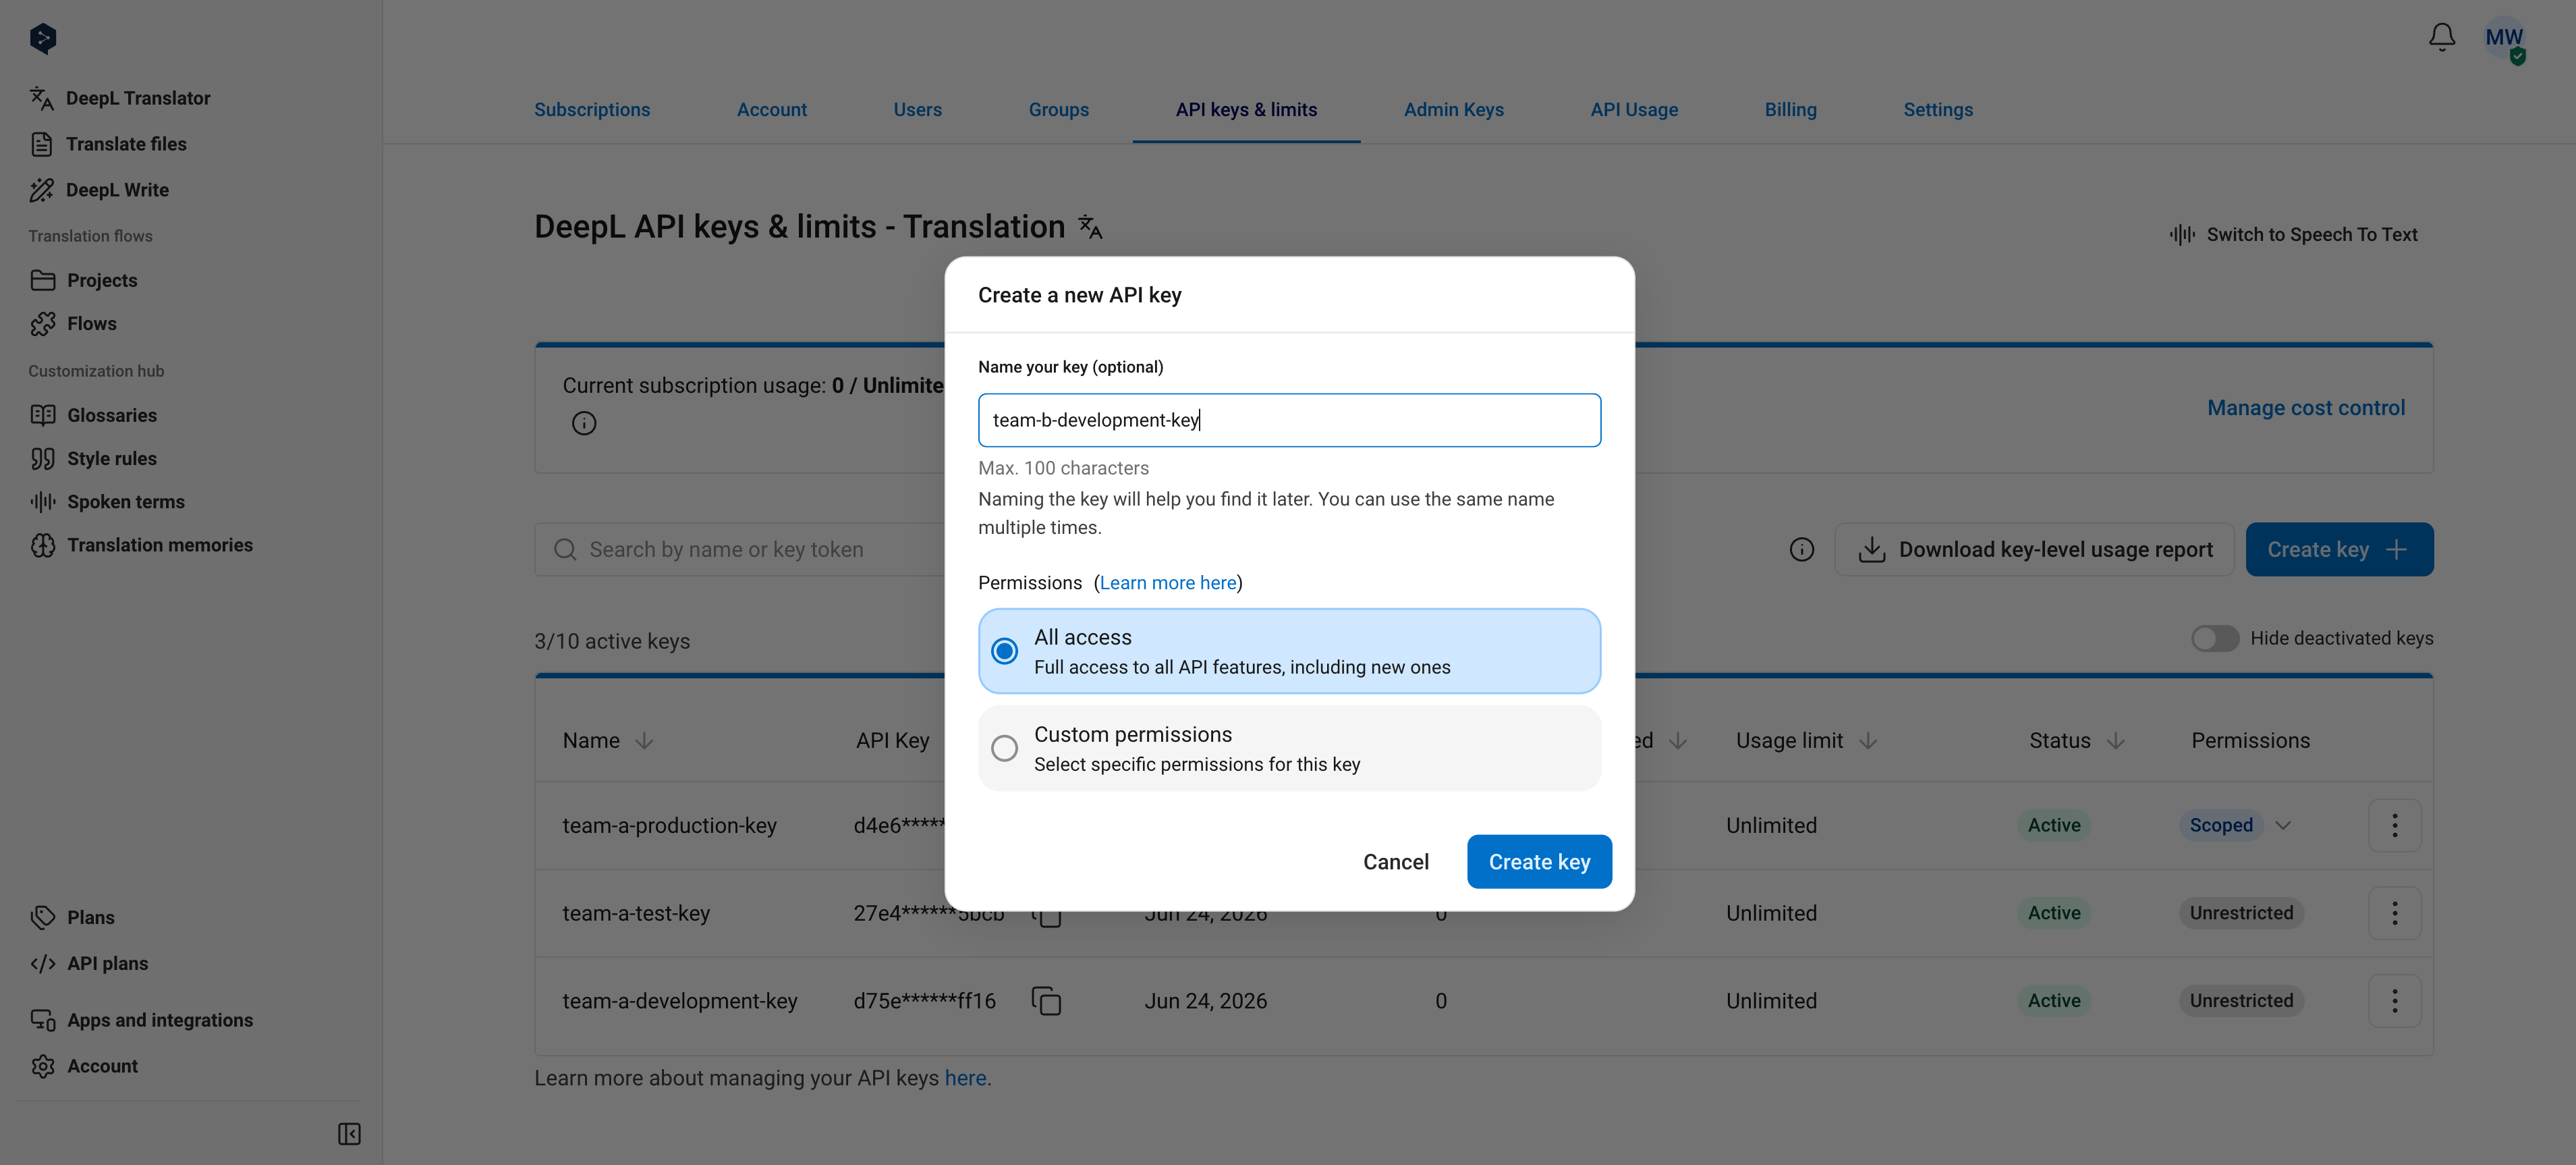 After you confirm, a popup shows the new key. Copy it from this popup to use it immediately, or copy it from the key table at any time.
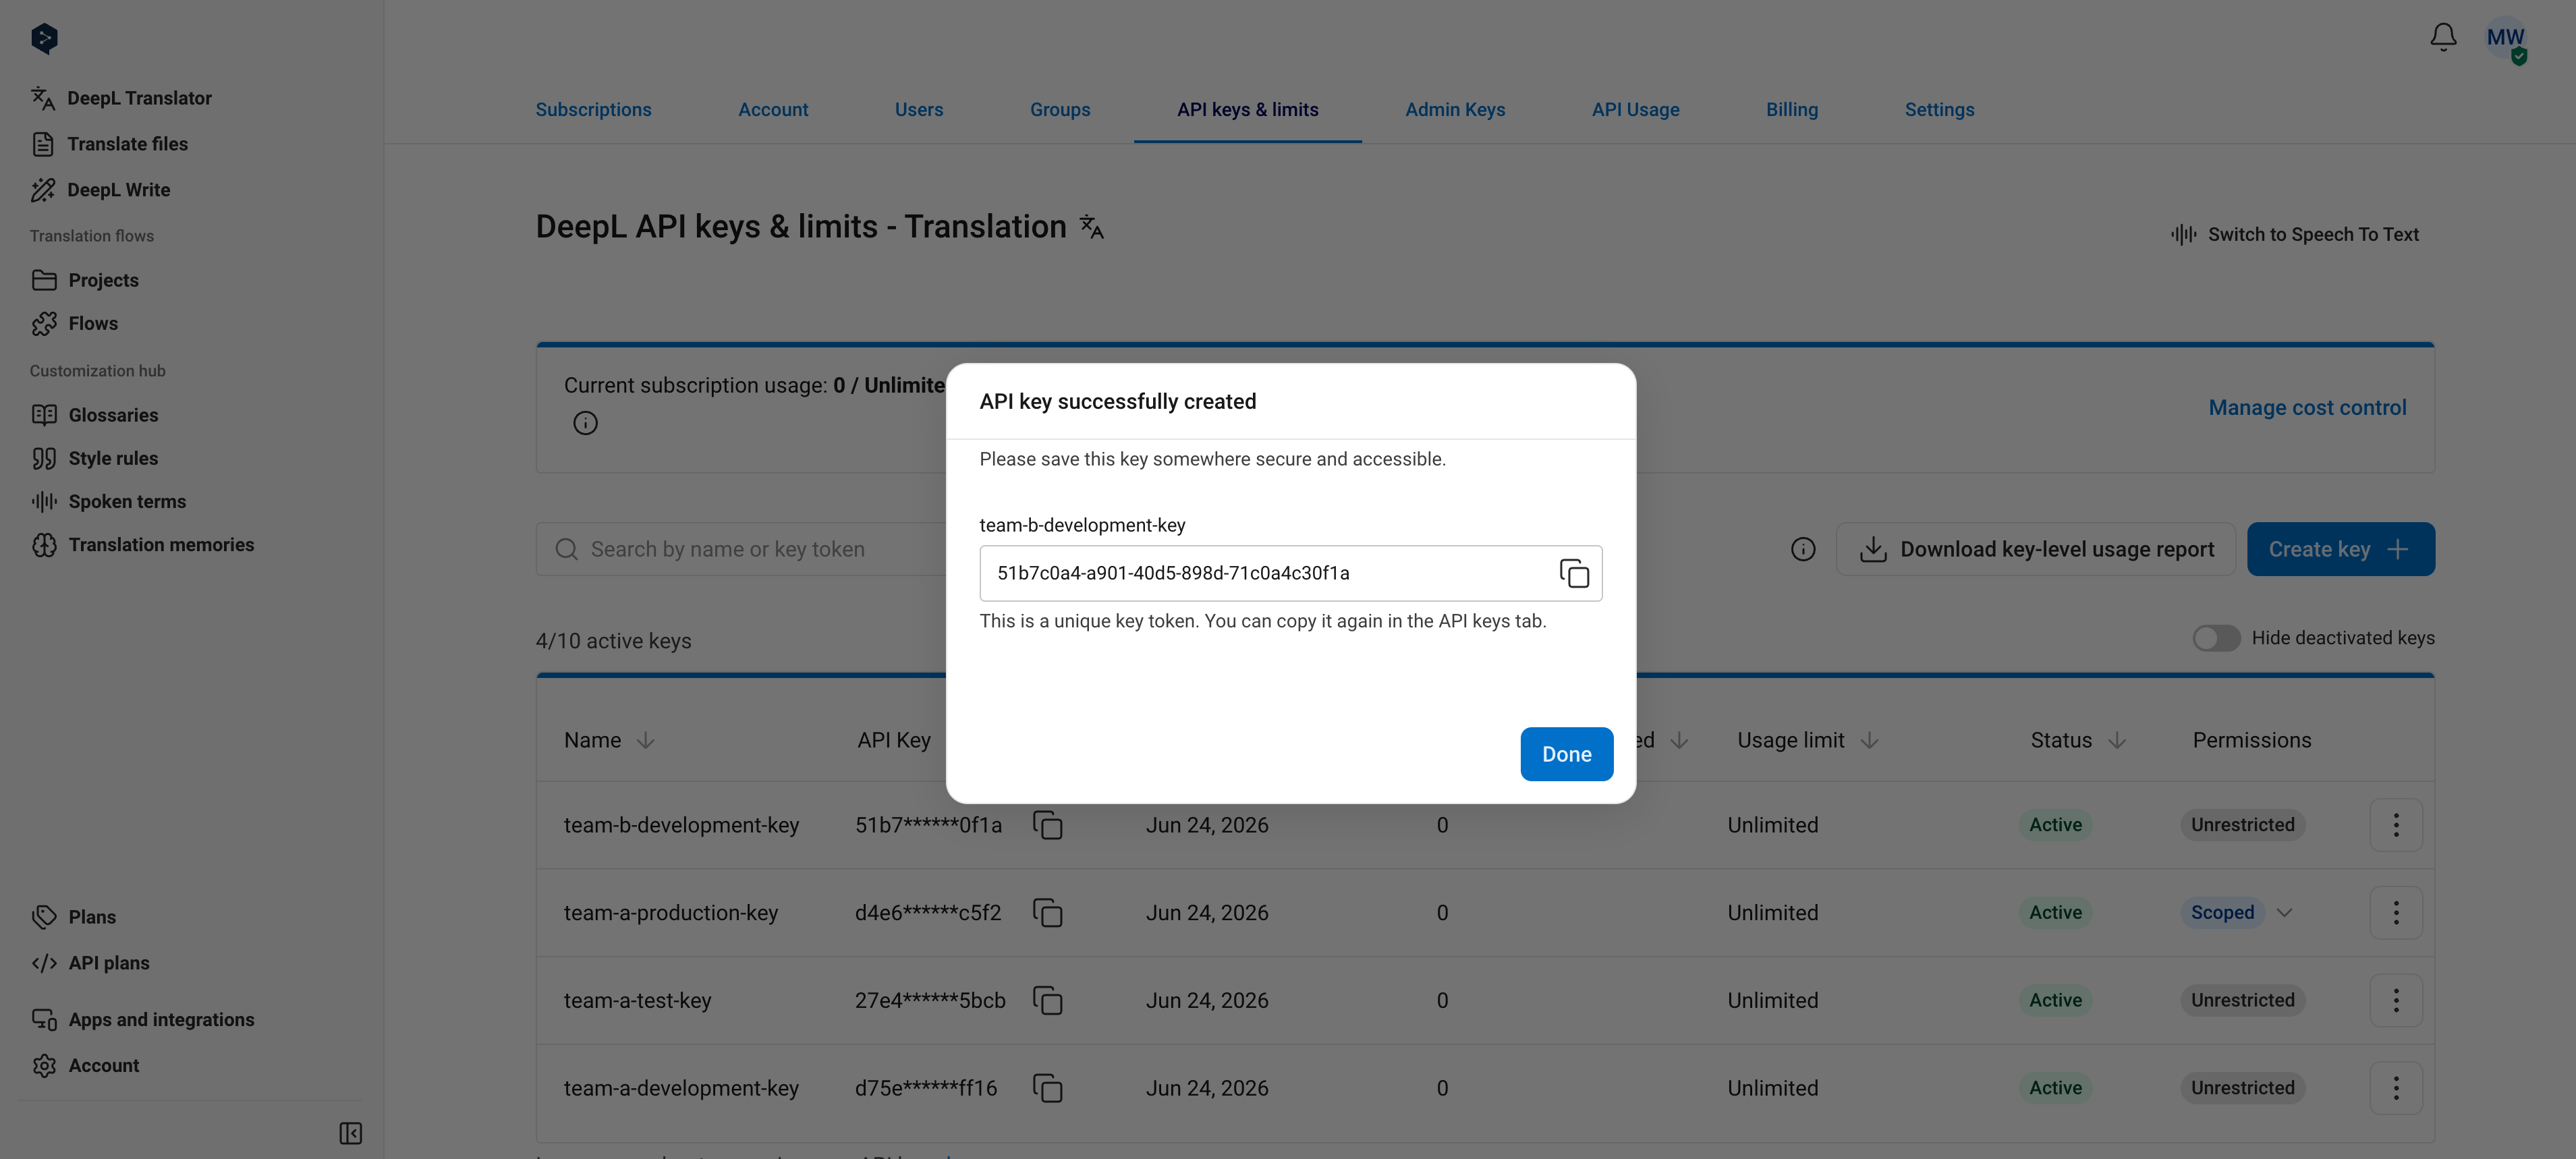 To create a key that can only access specific endpoints, select **Custom permissions** during creation. See [Set key permissions](#set-key-permissions).
## Copy a key
Click the "Copy" icon next to the key. For security reasons, the full key is never shown in the key table. Both active and deactivated keys can be copied.
To create a key that can only access specific endpoints, select **Custom permissions** during creation. See [Set key permissions](#set-key-permissions).
## Copy a key
Click the "Copy" icon next to the key. For security reasons, the full key is never shown in the key table. Both active and deactivated keys can be copied.
 ## Rename a key
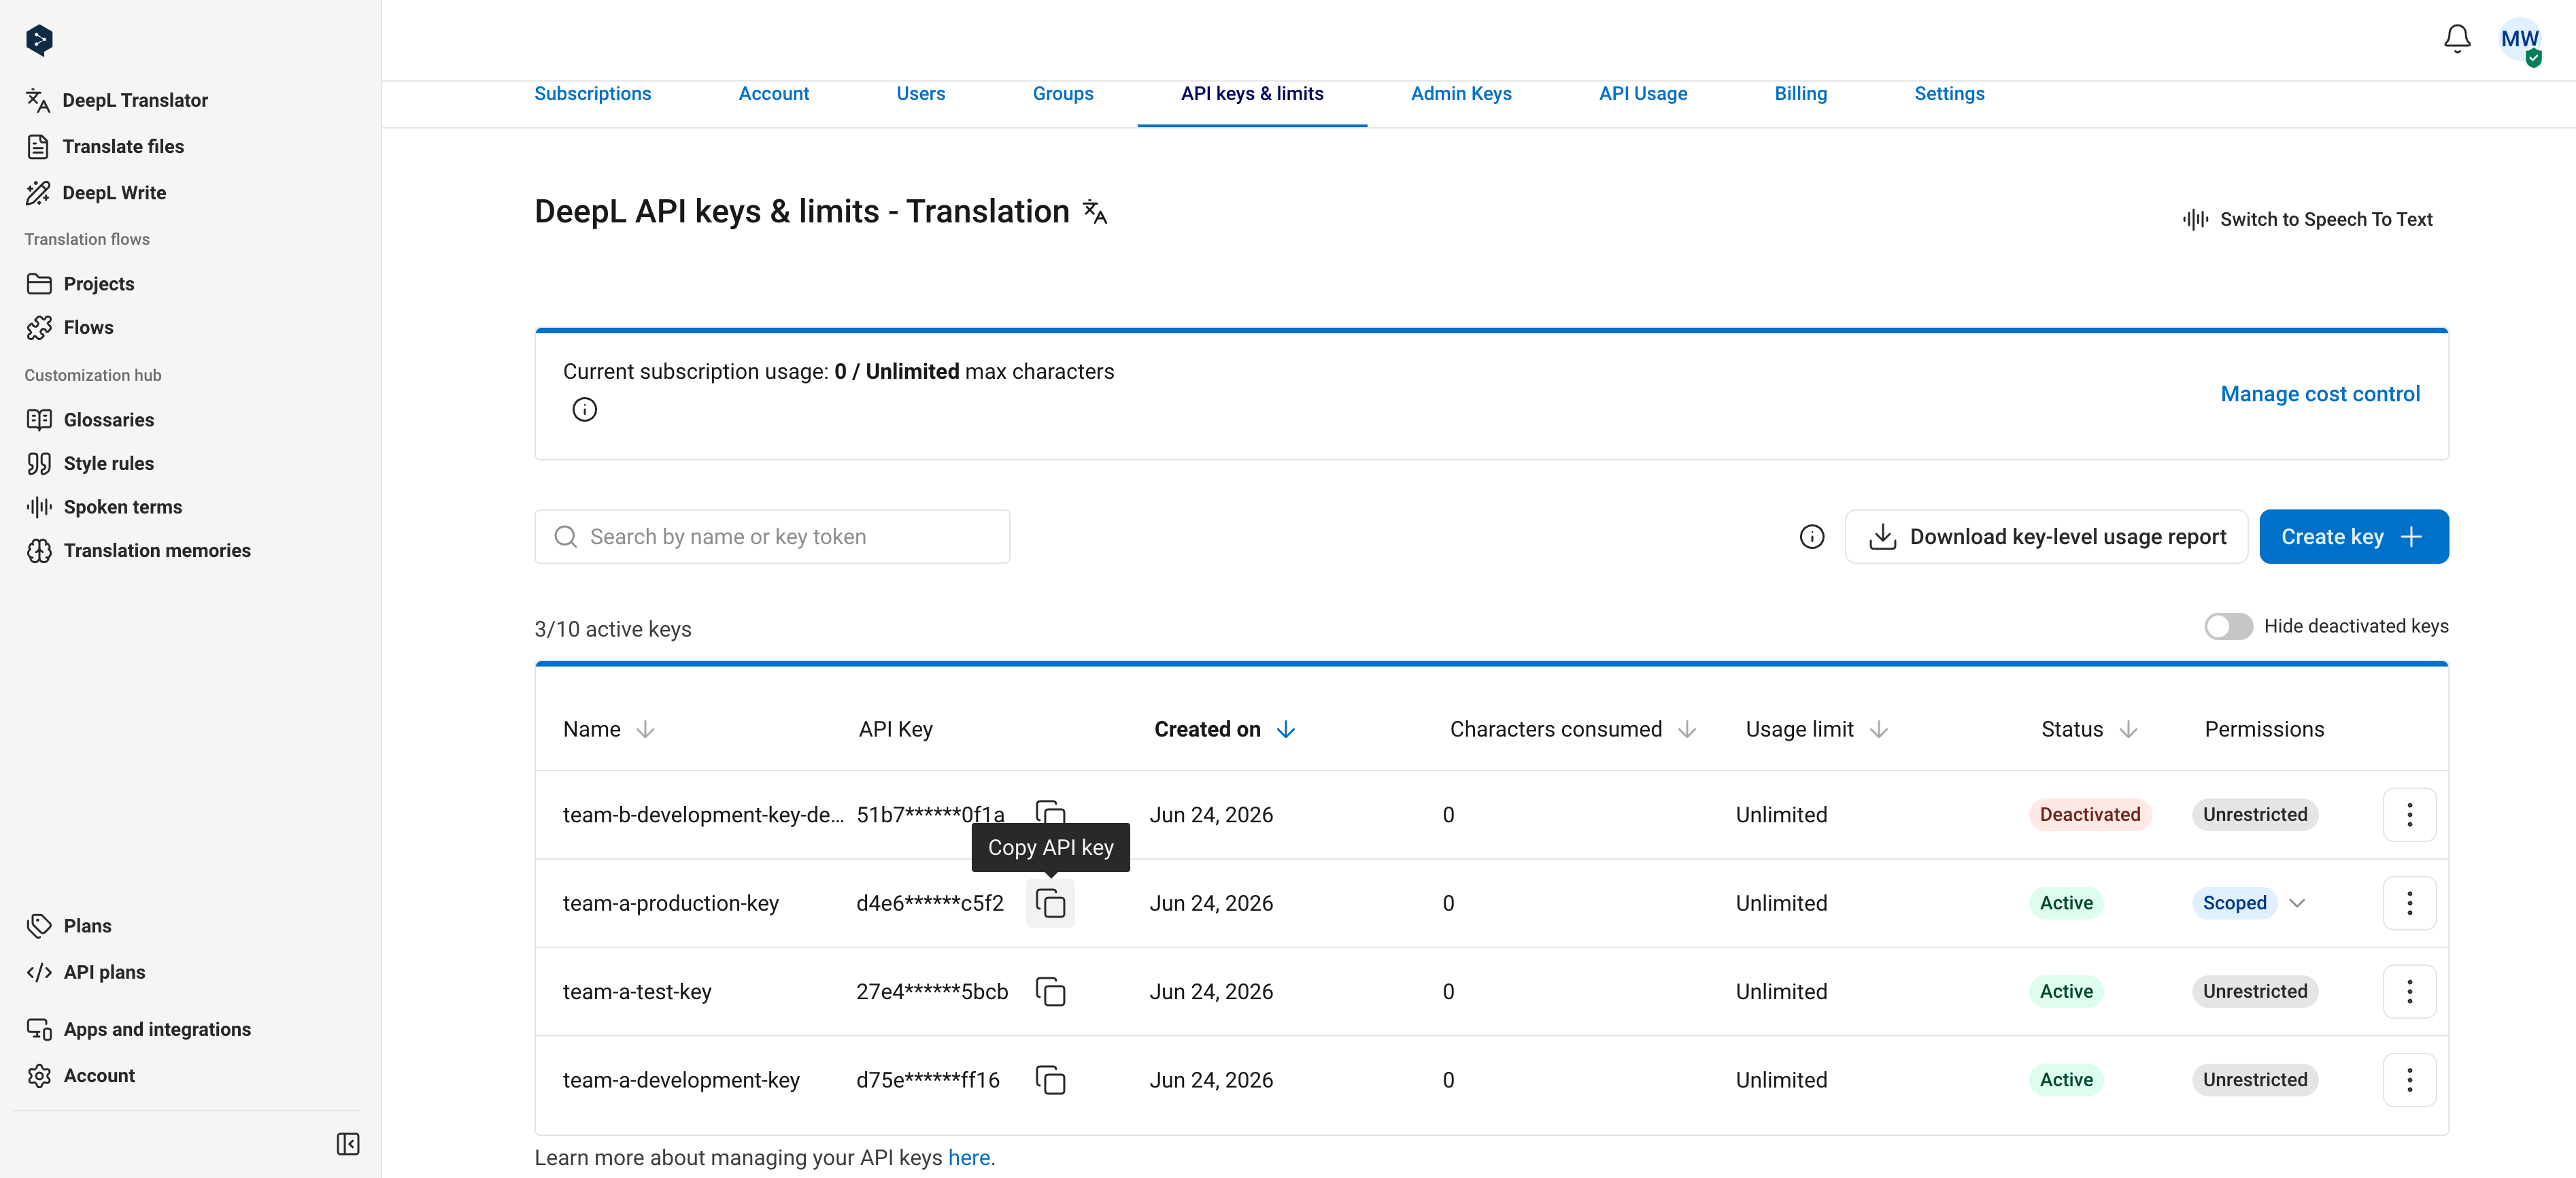
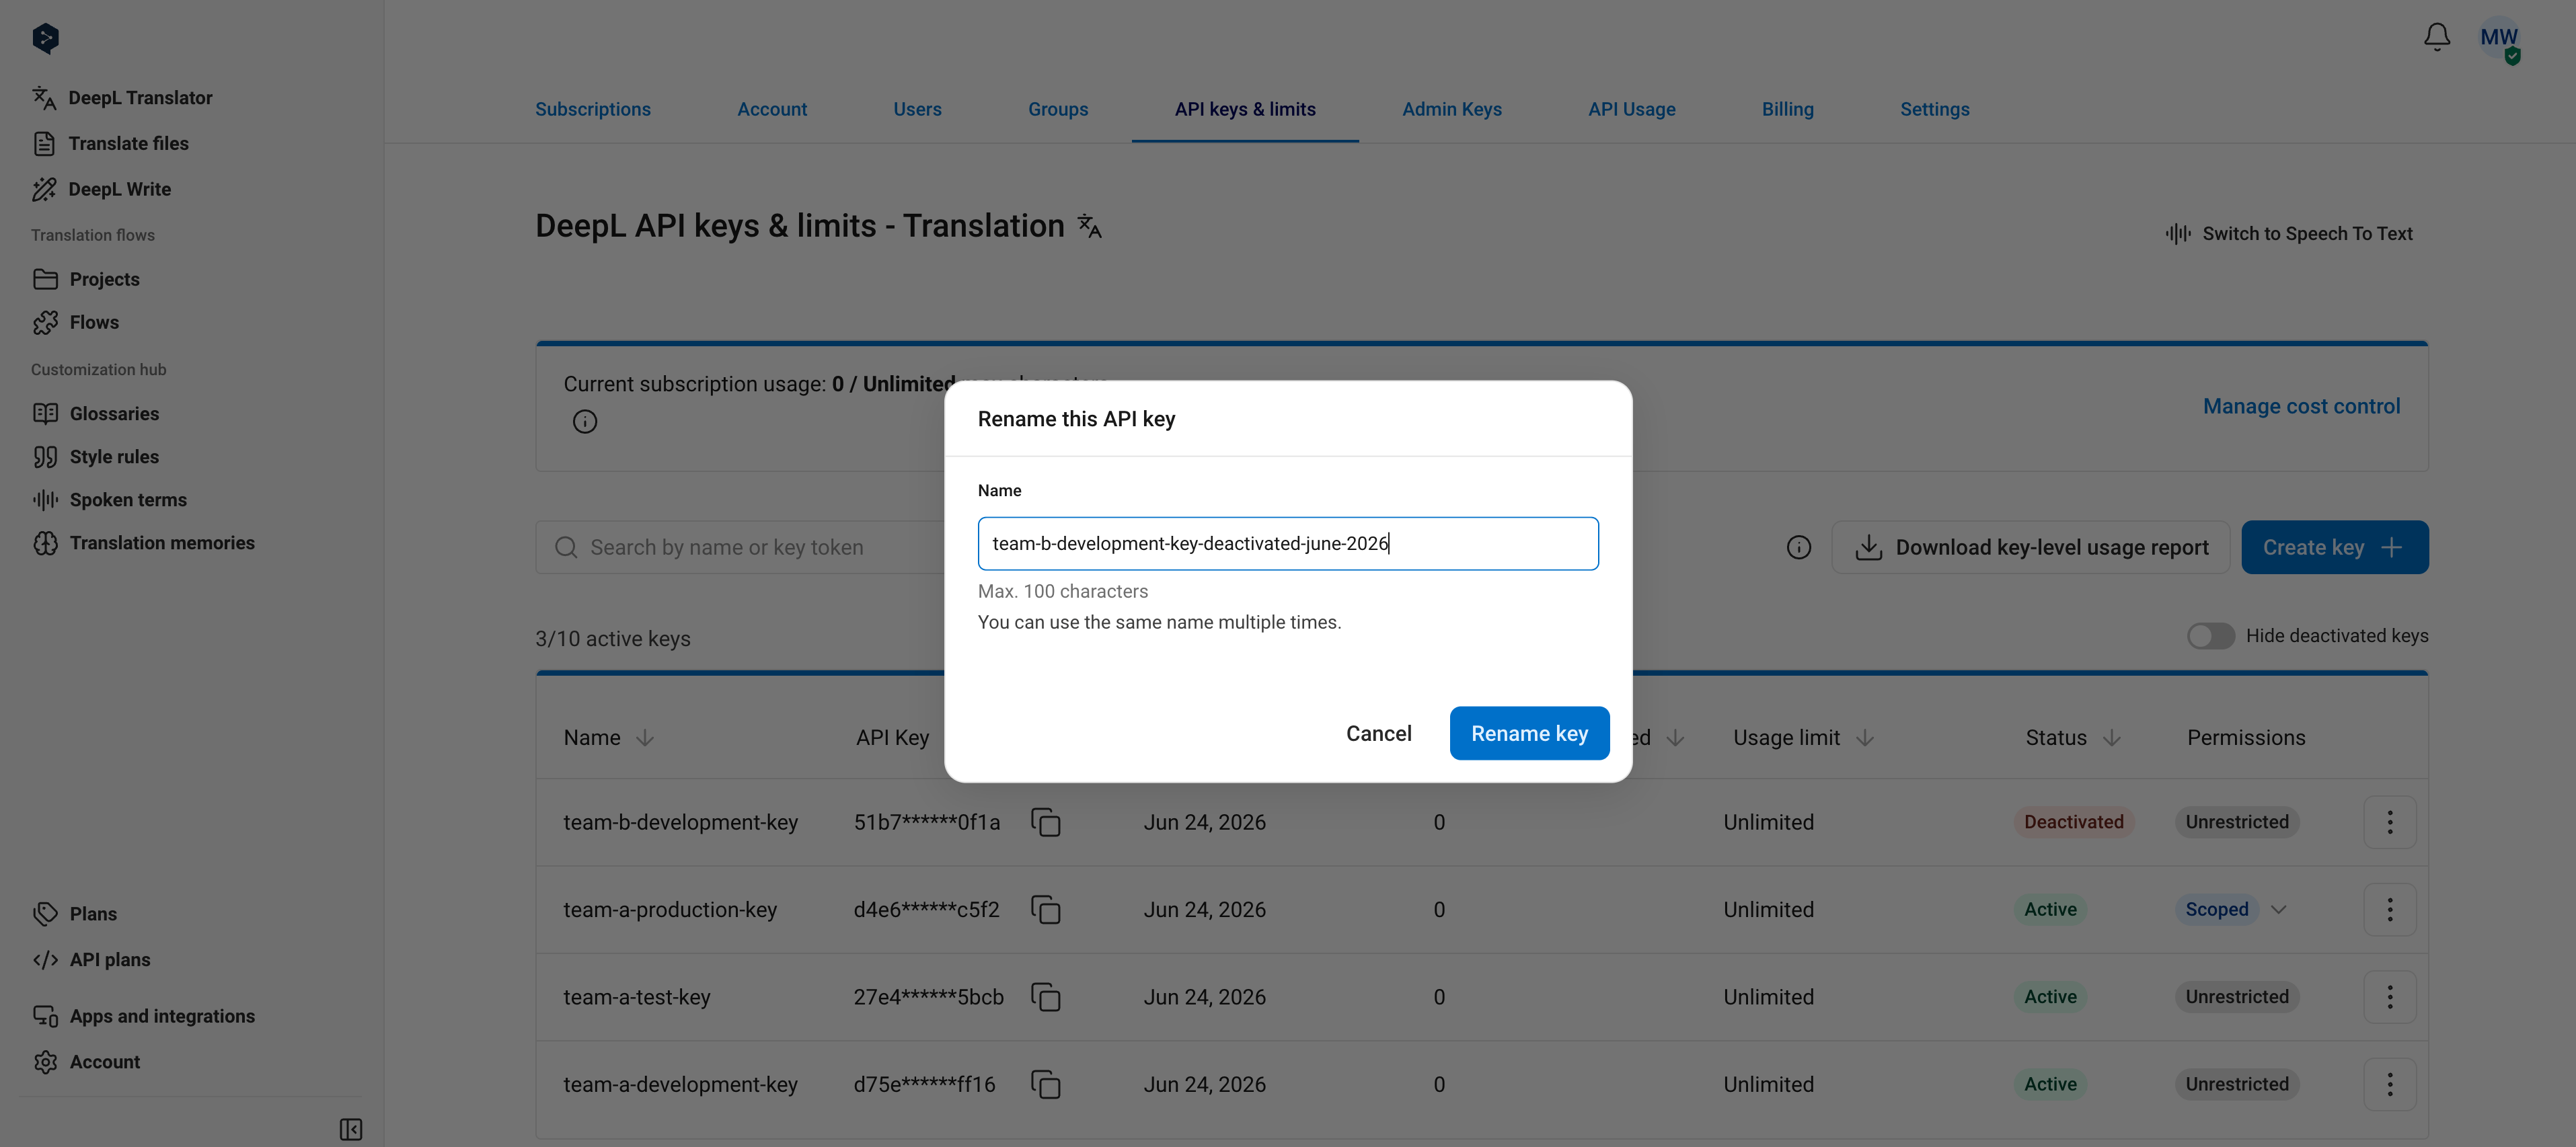
Select "Rename key" from the key's options menu. Both active and deactivated keys can be renamed, and two keys can share the same name.
## Rename a key
Select "Rename key" from the key's options menu. Both active and deactivated keys can be renamed, and two keys can share the same name.
 ## Deactivate a key
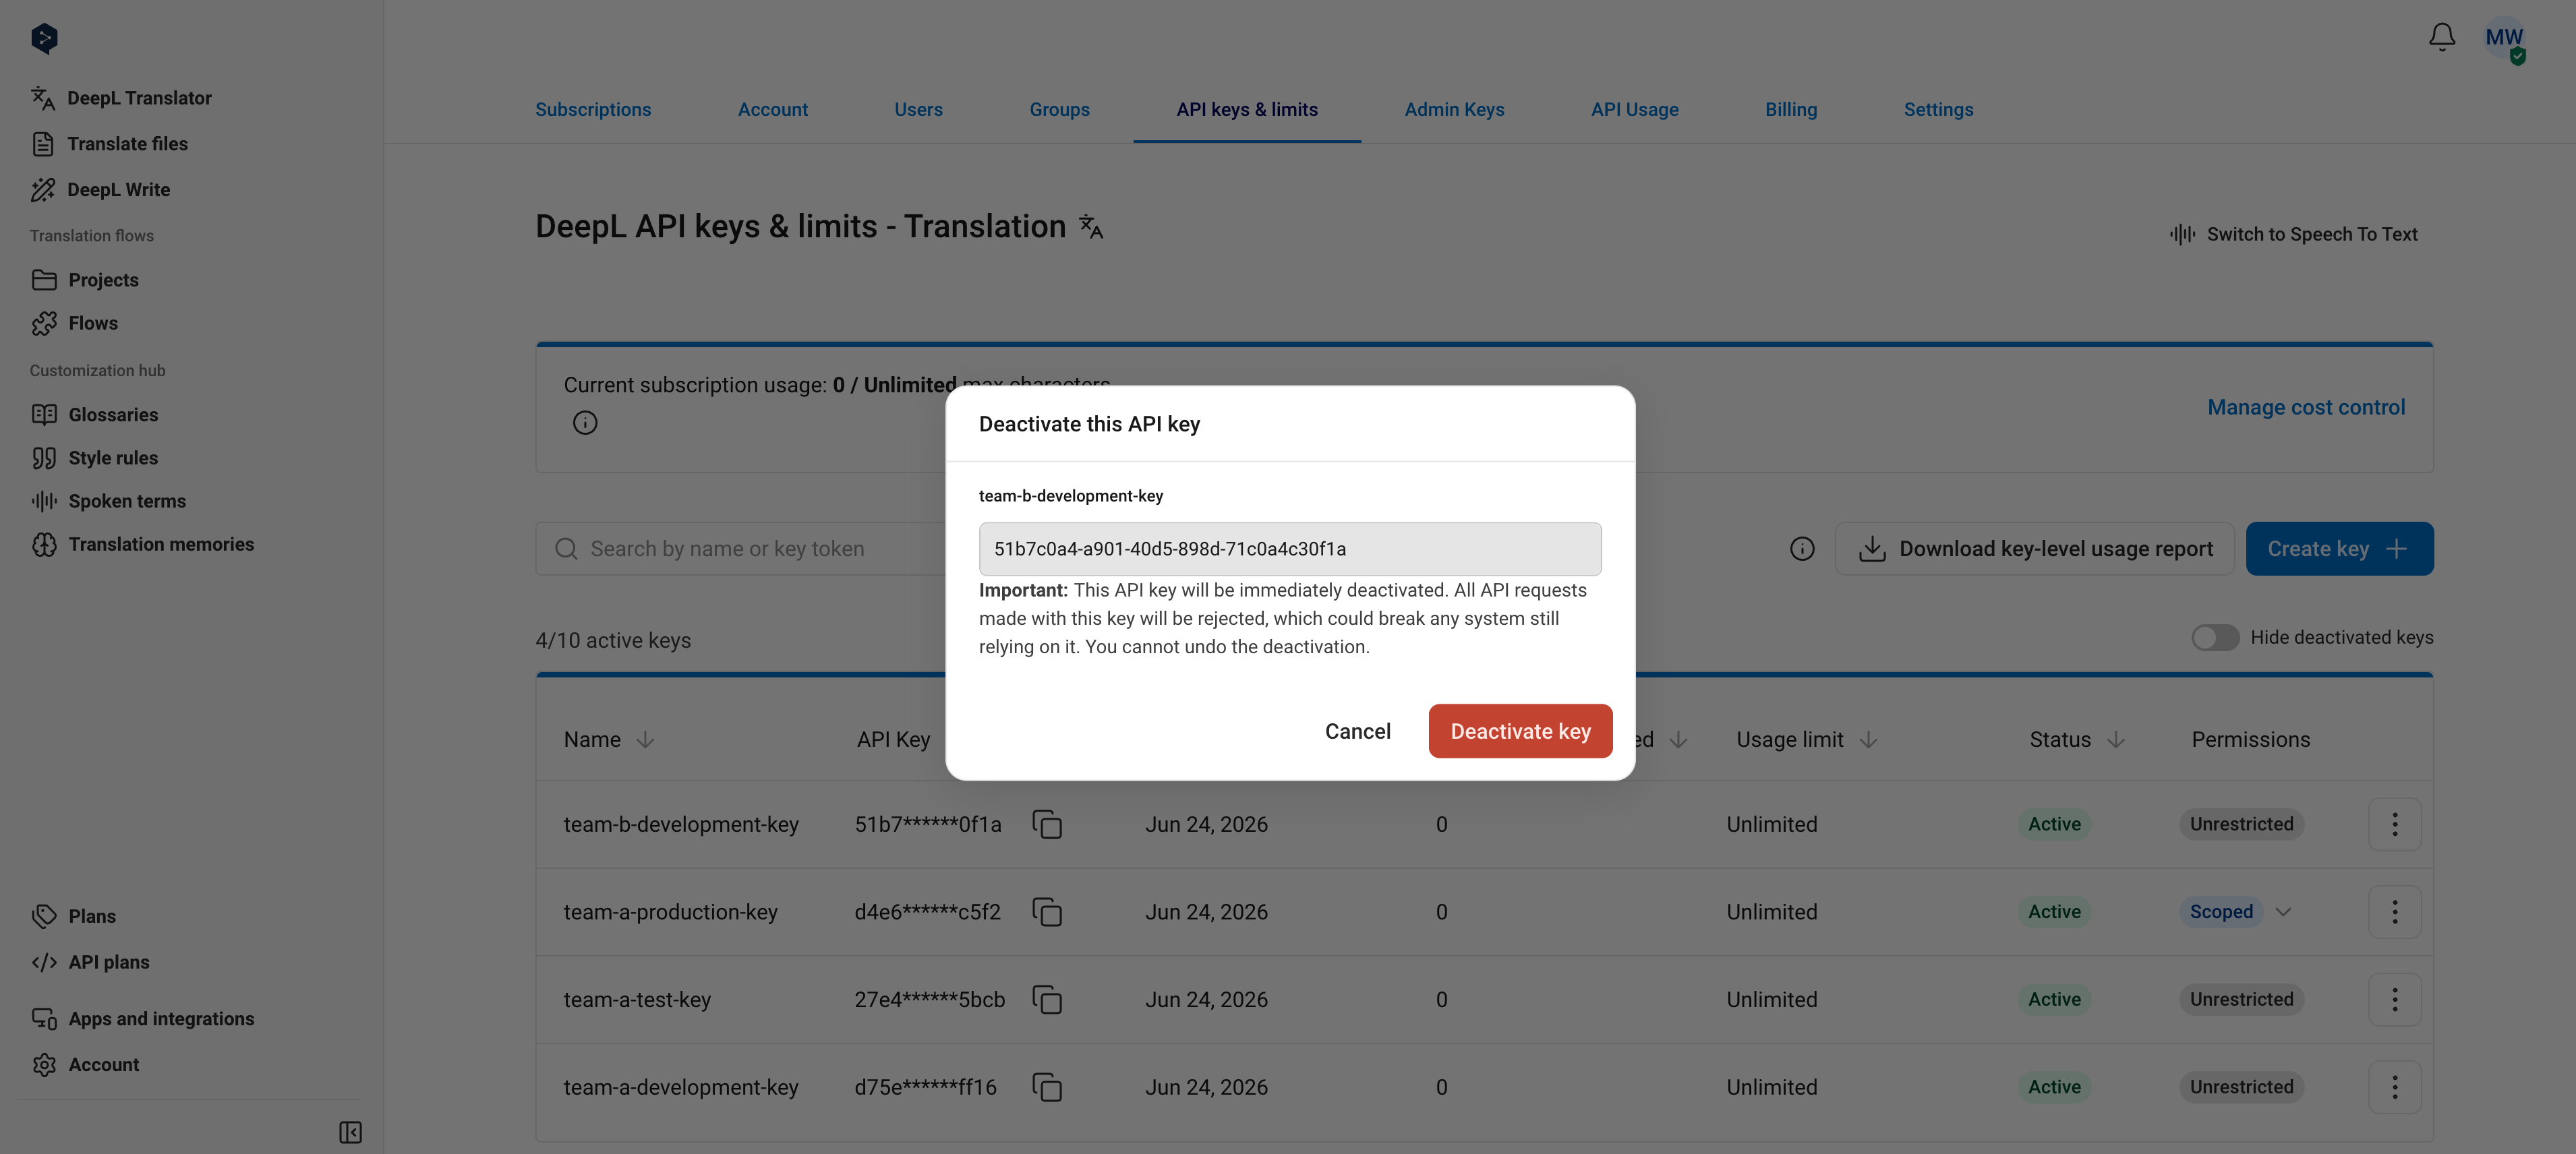
A key stops working immediately when deactivated, and deactivation is permanent: a deactivated key cannot be reactivated.
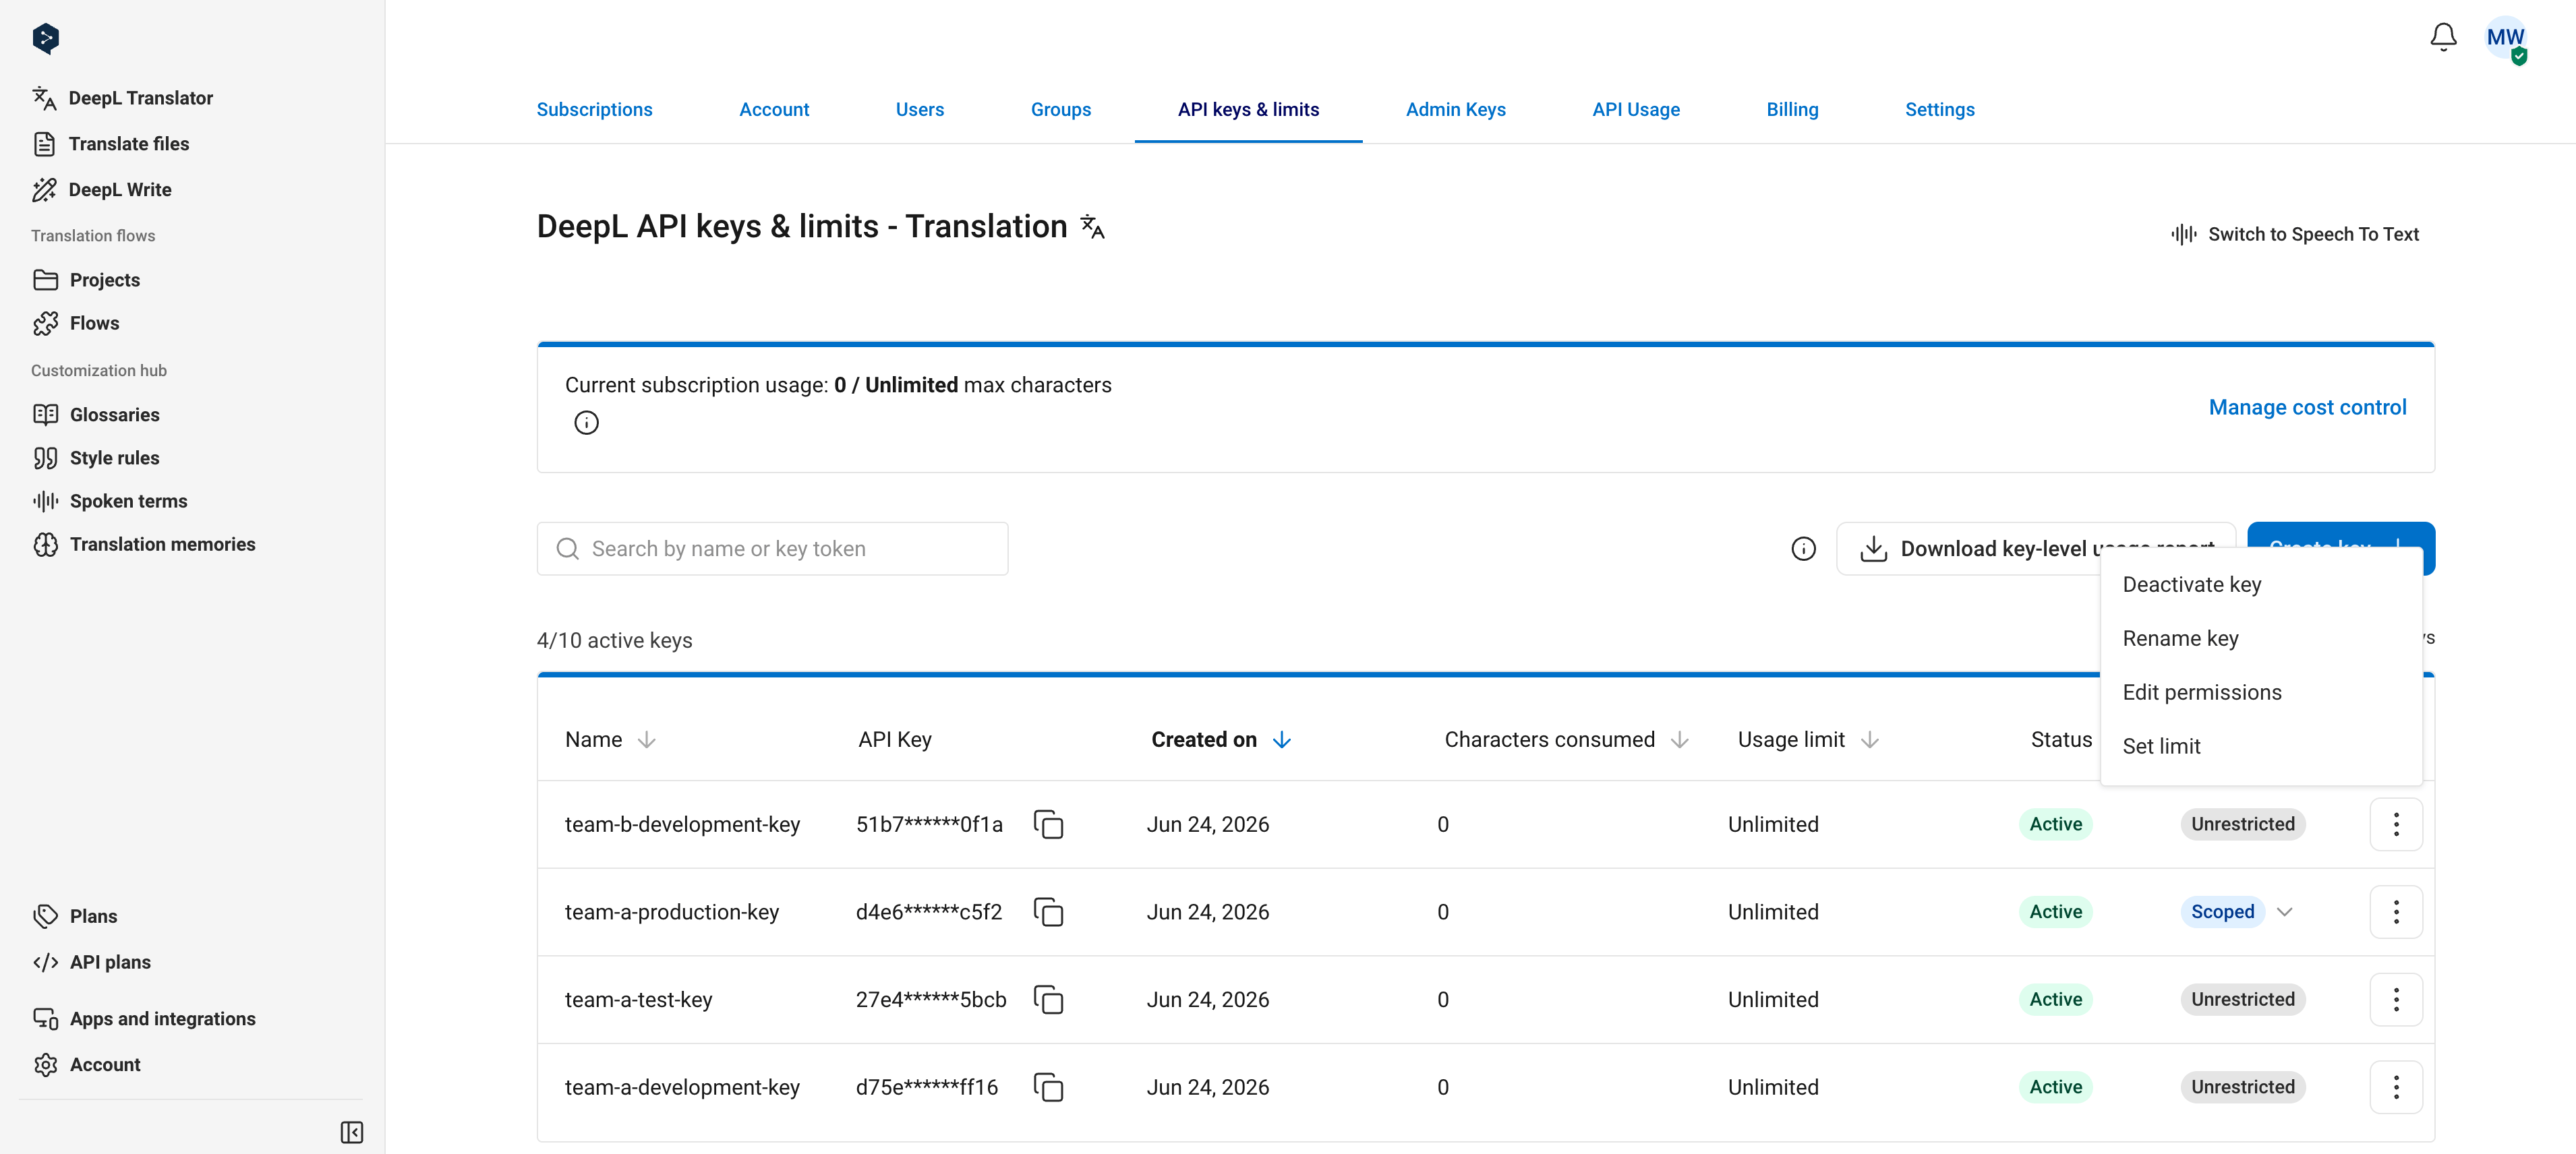
Select "Deactivate key" from the key's options menu, then confirm.
## Deactivate a key
A key stops working immediately when deactivated, and deactivation is permanent: a deactivated key cannot be reactivated.
Select "Deactivate key" from the key's options menu, then confirm.
 ## Set a key-level usage limit
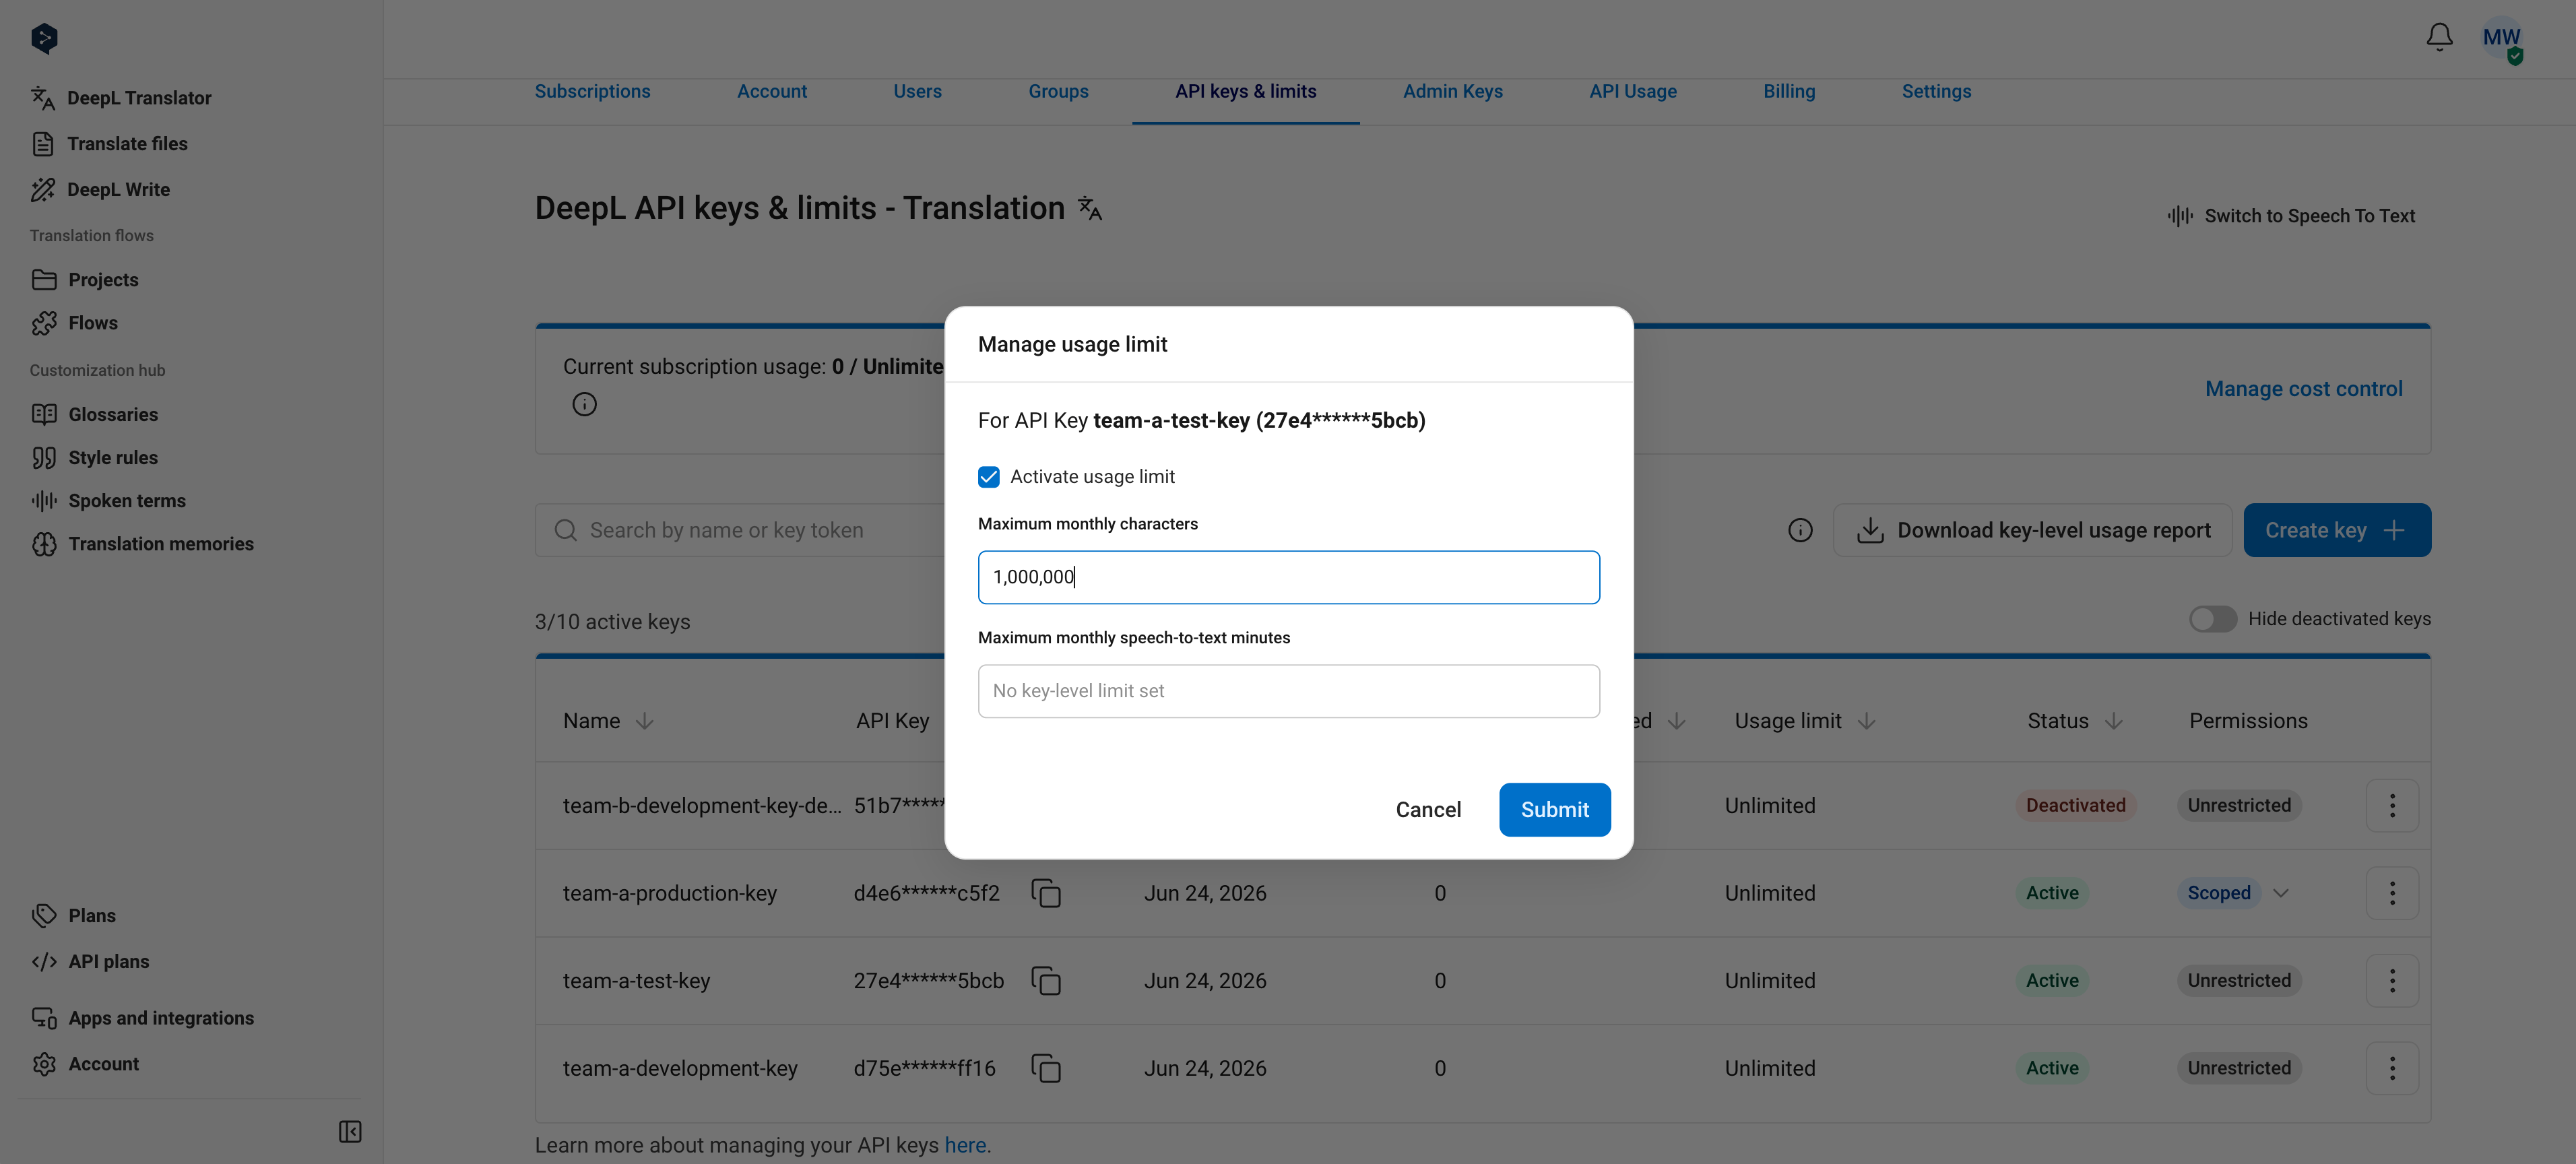
Key-level limits cap the total characters (across text translation, document translation, and text improvement) a key can consume in a one-month usage period. For example, a key with a 1,000,000 character limit stops consuming at 1,000,000 characters and starts fresh when the next usage period begins. You can see your current usage period dates in the [API Usage tab](https://www.deepl.com/your-account/usage).
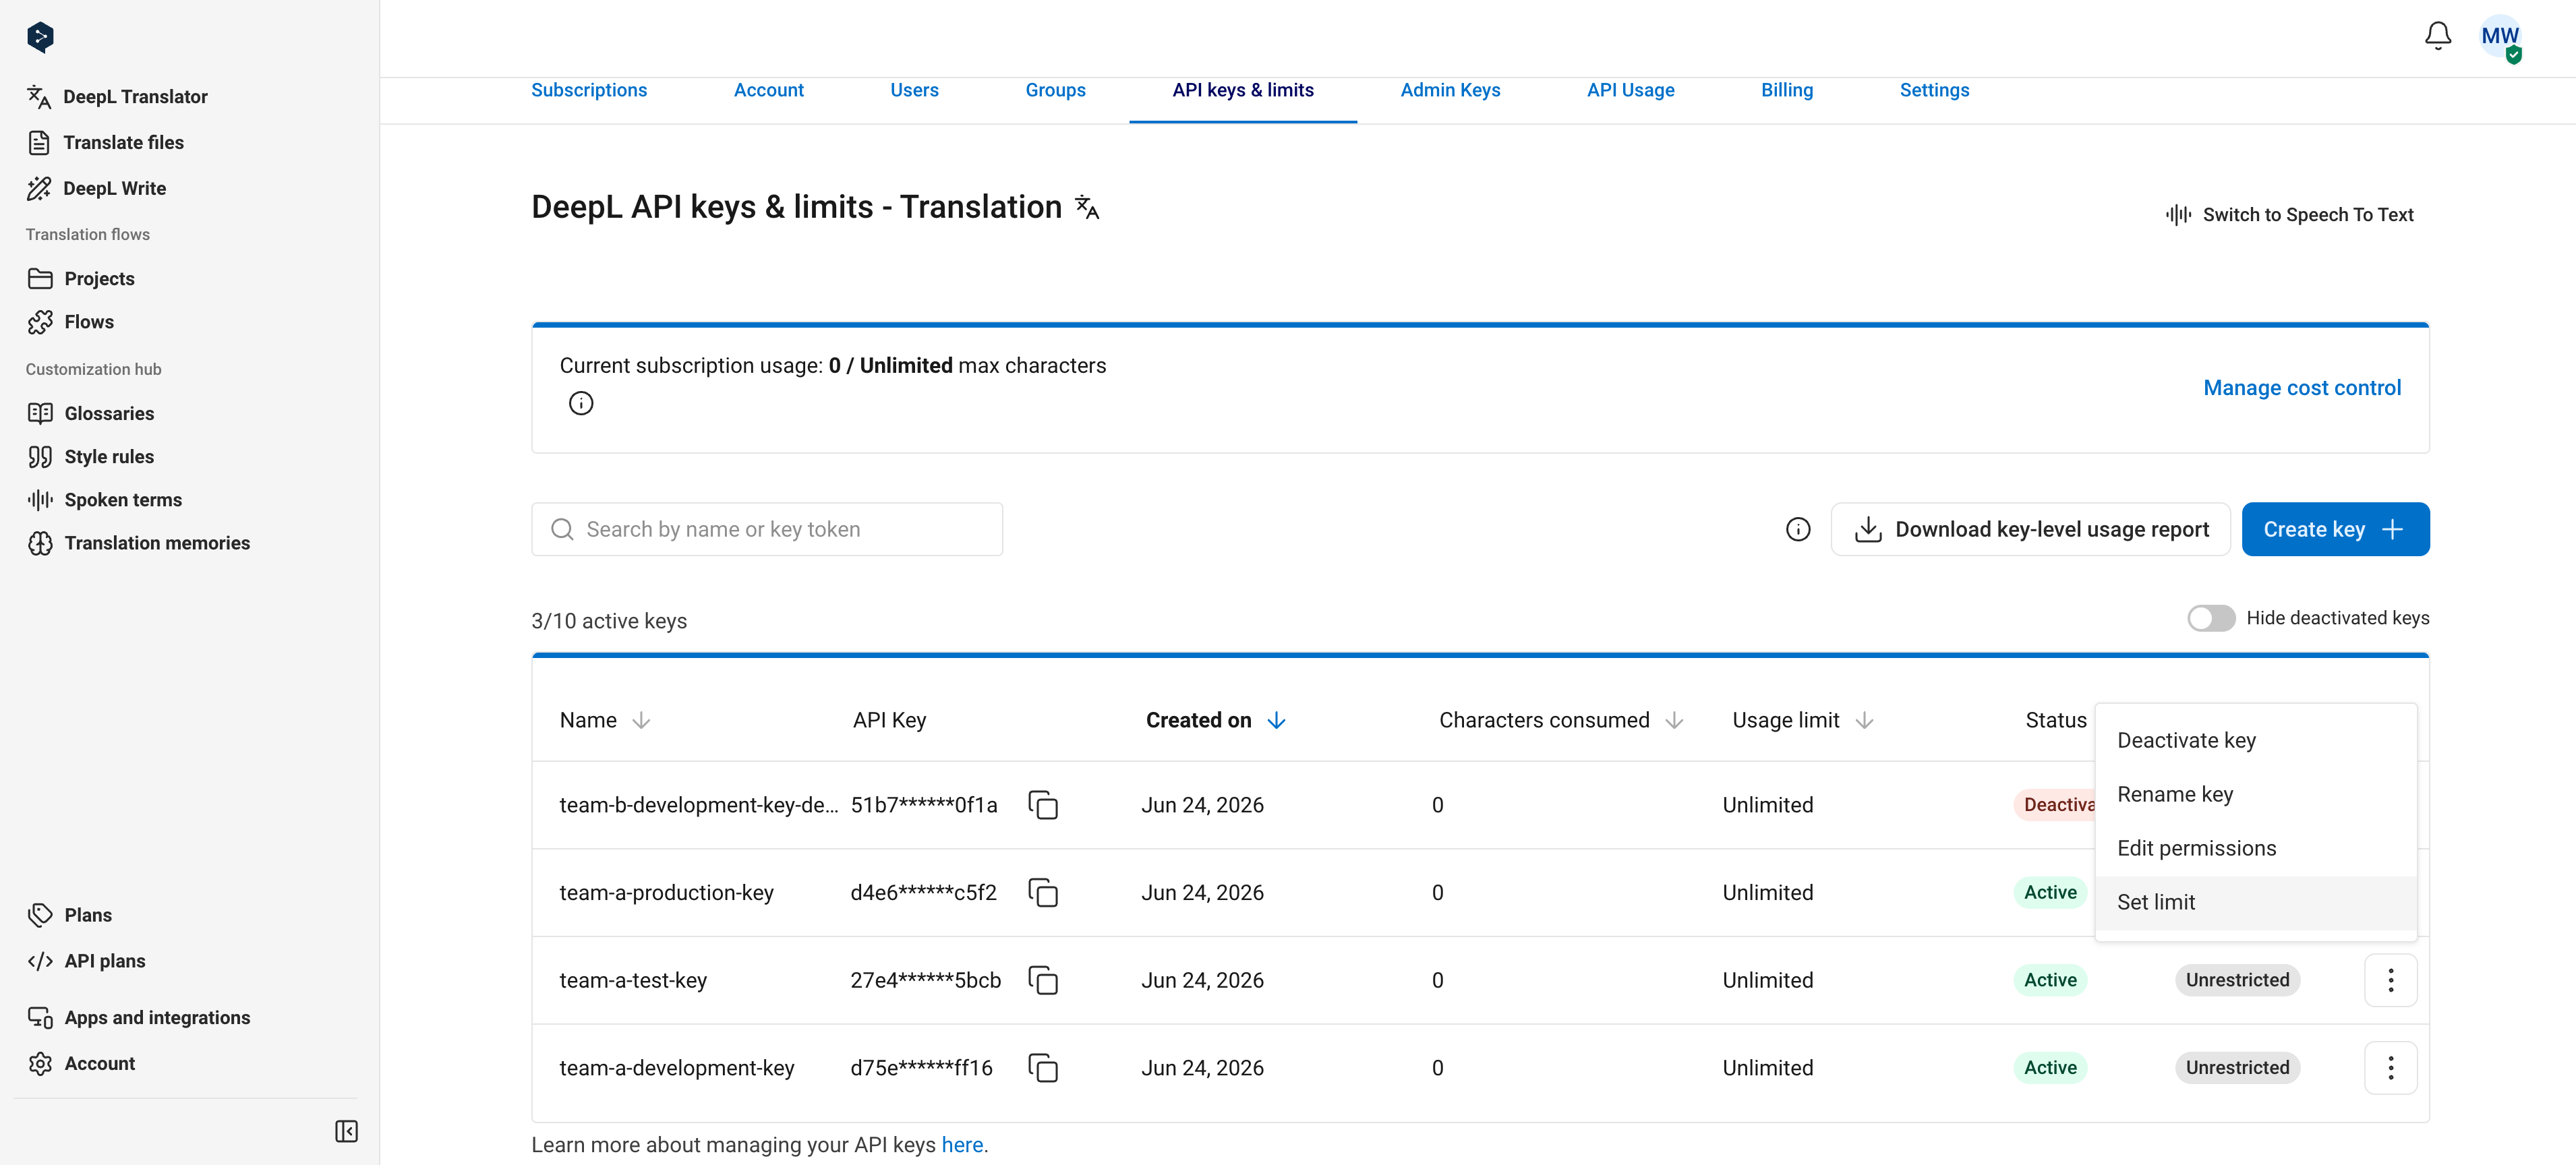
To set a limit, select "Set limit" from the key's options menu, activate the limit, and enter a character amount. Setting the limit to 0 prevents the key from consuming any characters.
## Set a key-level usage limit
Key-level limits cap the total characters (across text translation, document translation, and text improvement) a key can consume in a one-month usage period. For example, a key with a 1,000,000 character limit stops consuming at 1,000,000 characters and starts fresh when the next usage period begins. You can see your current usage period dates in the [API Usage tab](https://www.deepl.com/your-account/usage).
To set a limit, select "Set limit" from the key's options menu, activate the limit, and enter a character amount. Setting the limit to 0 prevents the key from consuming any characters.
 As with subscription-level [cost control](/docs/best-practices/cost-control):
* You receive notification emails when a key reaches 80% and 100% of its limit
* The API responds with `456 Quota exceeded` errors once 100% of the limit is reached
To monitor consumption against a limit, check the "Characters consumed" column in the key table or see [Retrieving Usage Data](/docs/admin/retrieving-usage-data).
## Set key permissions
Permissions restrict a developer key to specific endpoints. This section covers the UI steps; to understand how permissions are enforced, see [Understanding API Key Permissions](/docs/admin/api-key-permissions), and for what each scope covers, see [Permission Scopes](/docs/admin/permission-scopes).
To create a scoped key, click "Create key", select **Custom permissions**, choose one or more scopes from the list, and confirm.
As with subscription-level [cost control](/docs/best-practices/cost-control):
* You receive notification emails when a key reaches 80% and 100% of its limit
* The API responds with `456 Quota exceeded` errors once 100% of the limit is reached
To monitor consumption against a limit, check the "Characters consumed" column in the key table or see [Retrieving Usage Data](/docs/admin/retrieving-usage-data).
## Set key permissions
Permissions restrict a developer key to specific endpoints. This section covers the UI steps; to understand how permissions are enforced, see [Understanding API Key Permissions](/docs/admin/api-key-permissions), and for what each scope covers, see [Permission Scopes](/docs/admin/permission-scopes).
To create a scoped key, click "Create key", select **Custom permissions**, choose one or more scopes from the list, and confirm.
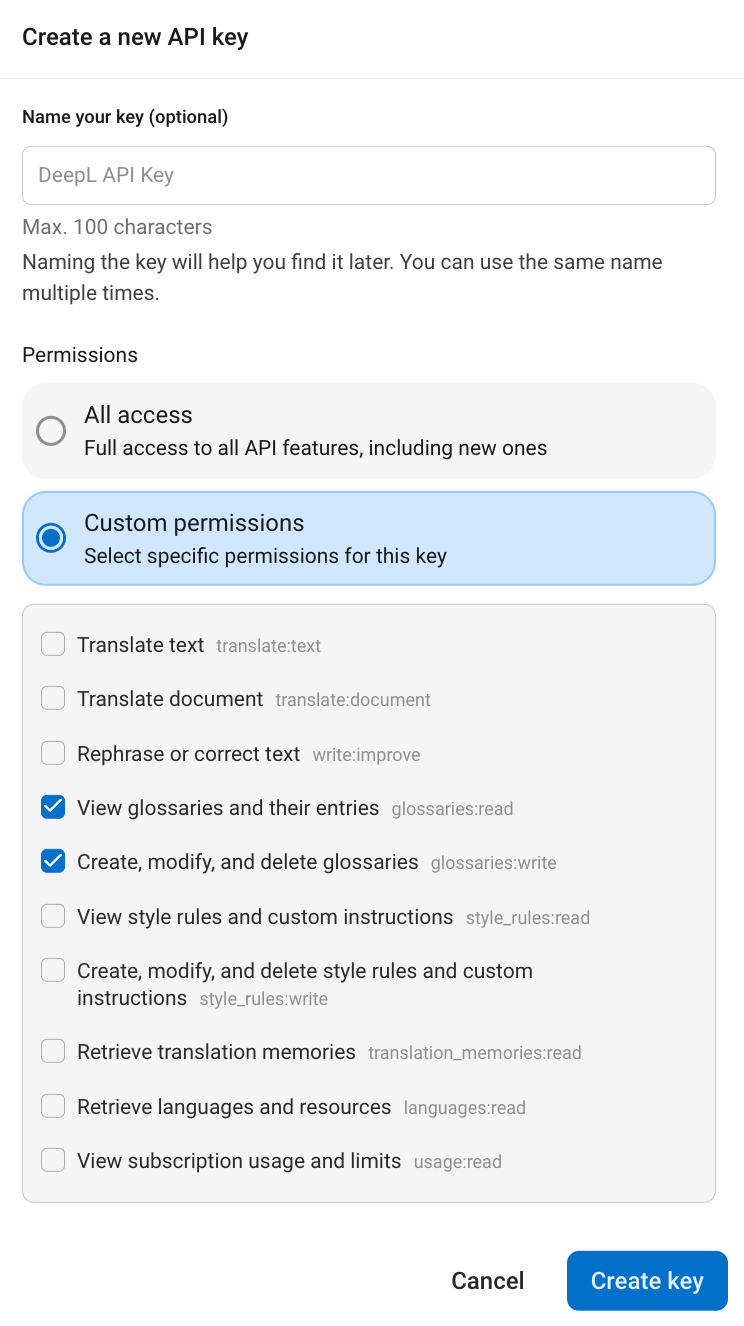 To change permissions on an existing key, select "Edit permissions" from the key's options menu. Choose **All access** to make the key unrestricted, or **Custom permissions** to select specific scopes, then save.
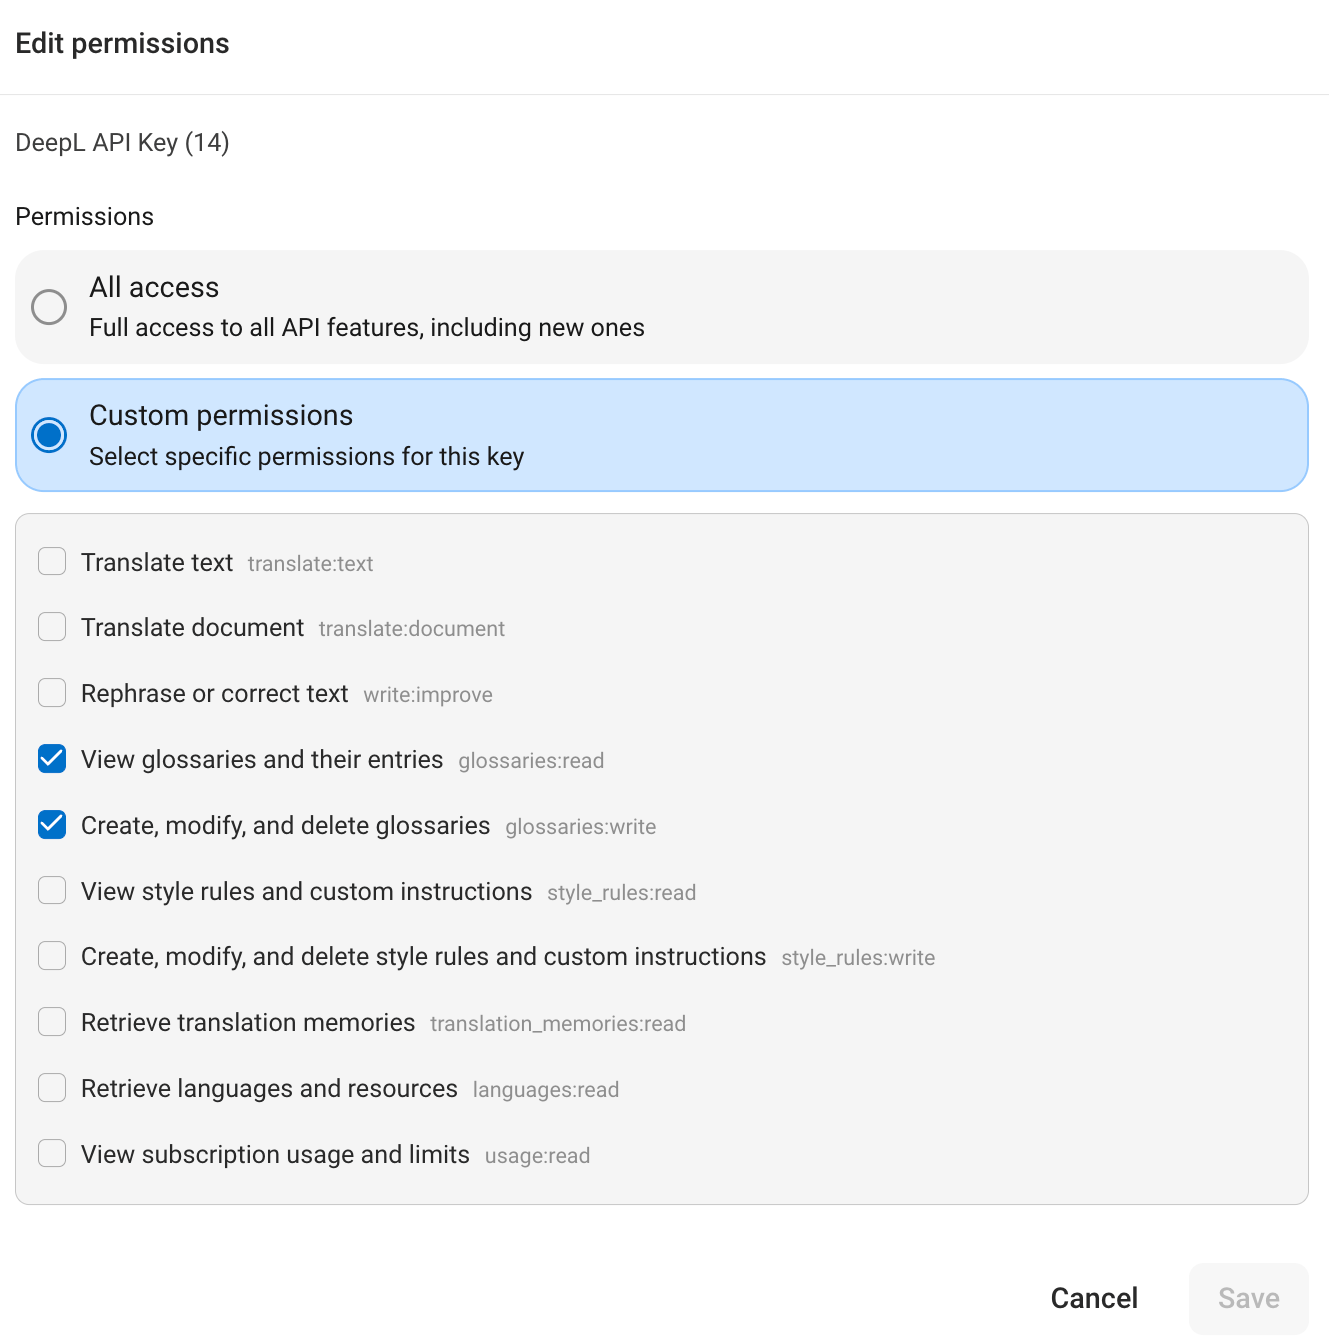 The "Permissions" column in the key table shows each key's status as a badge. Hover over a badge to see the assigned scopes.
 ## Manage admin API keys
If your account has [Admin API access](/docs/admin/overview#the-admin-api), you manage admin keys separately in the ["Admin Keys" tab](https://www.deepl.com/your-account/admin).
## Manage admin API keys
If your account has [Admin API access](/docs/admin/overview#the-admin-api), you manage admin keys separately in the ["Admin Keys" tab](https://www.deepl.com/your-account/admin).
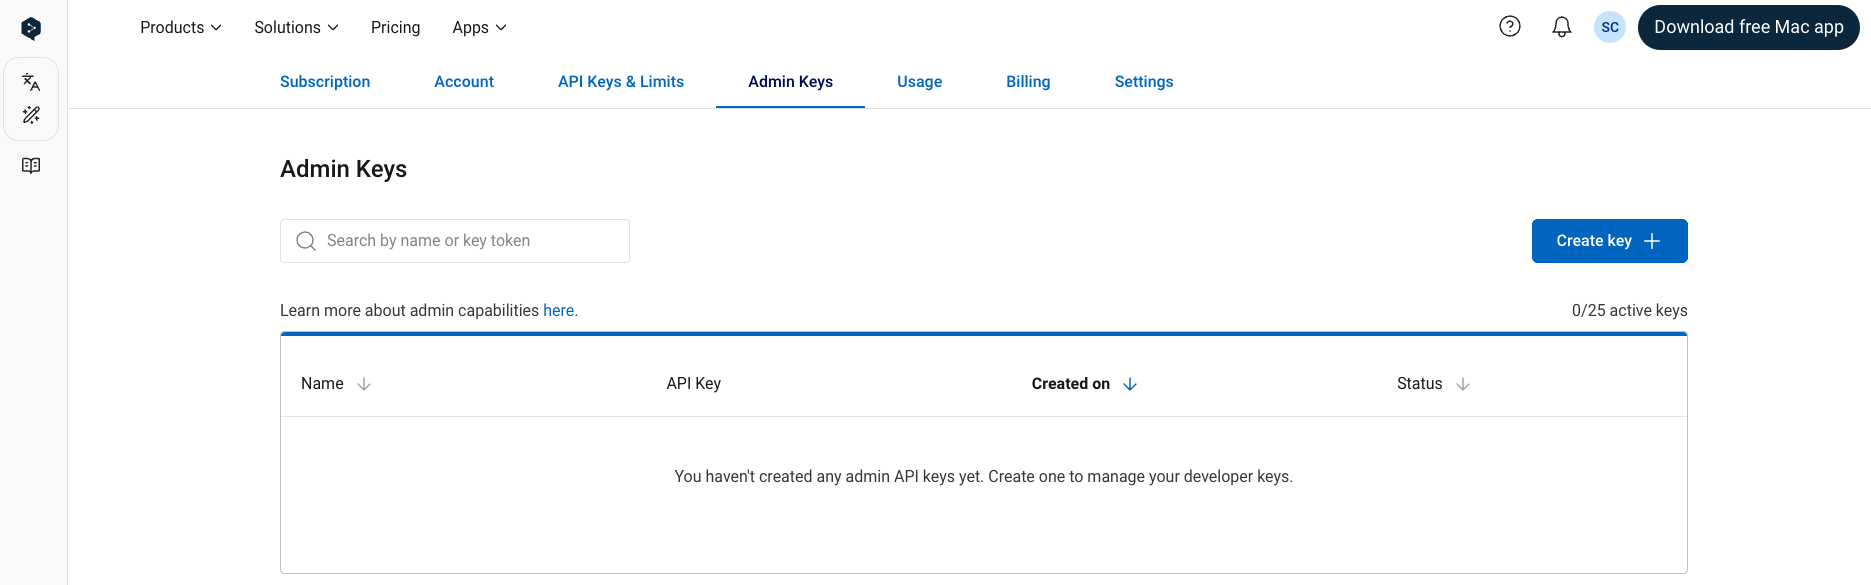 Admin keys support the same actions as developer keys: create, copy, rename, and deactivate them from the "Admin Keys" tab exactly as described above. The differences:
* Admin keys always end with an `:adm` suffix, which distinguishes them from developer keys
* Unnamed admin keys are called "DeepL Admin Key" by default
* You can create up to 25 simultaneously active admin keys on any plan with Admin API access
* Usage limits and permissions don't apply to admin keys
Admin keys support the same actions as developer keys: create, copy, rename, and deactivate them from the "Admin Keys" tab exactly as described above. The differences:
* Admin keys always end with an `:adm` suffix, which distinguishes them from developer keys
* Unnamed admin keys are called "DeepL Admin Key" by default
* You can create up to 25 simultaneously active admin keys on any plan with Admin API access
* Usage limits and permissions don't apply to admin keys